Connect ReactJs with MetaMask Wallet in 3 Steps.

24, Documenting my journey of DevOps | GenAI | Blockchain | NFTs
Introduction
In this tutorial, we will learn how to connect your MetaMask Wallet with ReactJs.
Note: For this you need to have your registered metamask account.
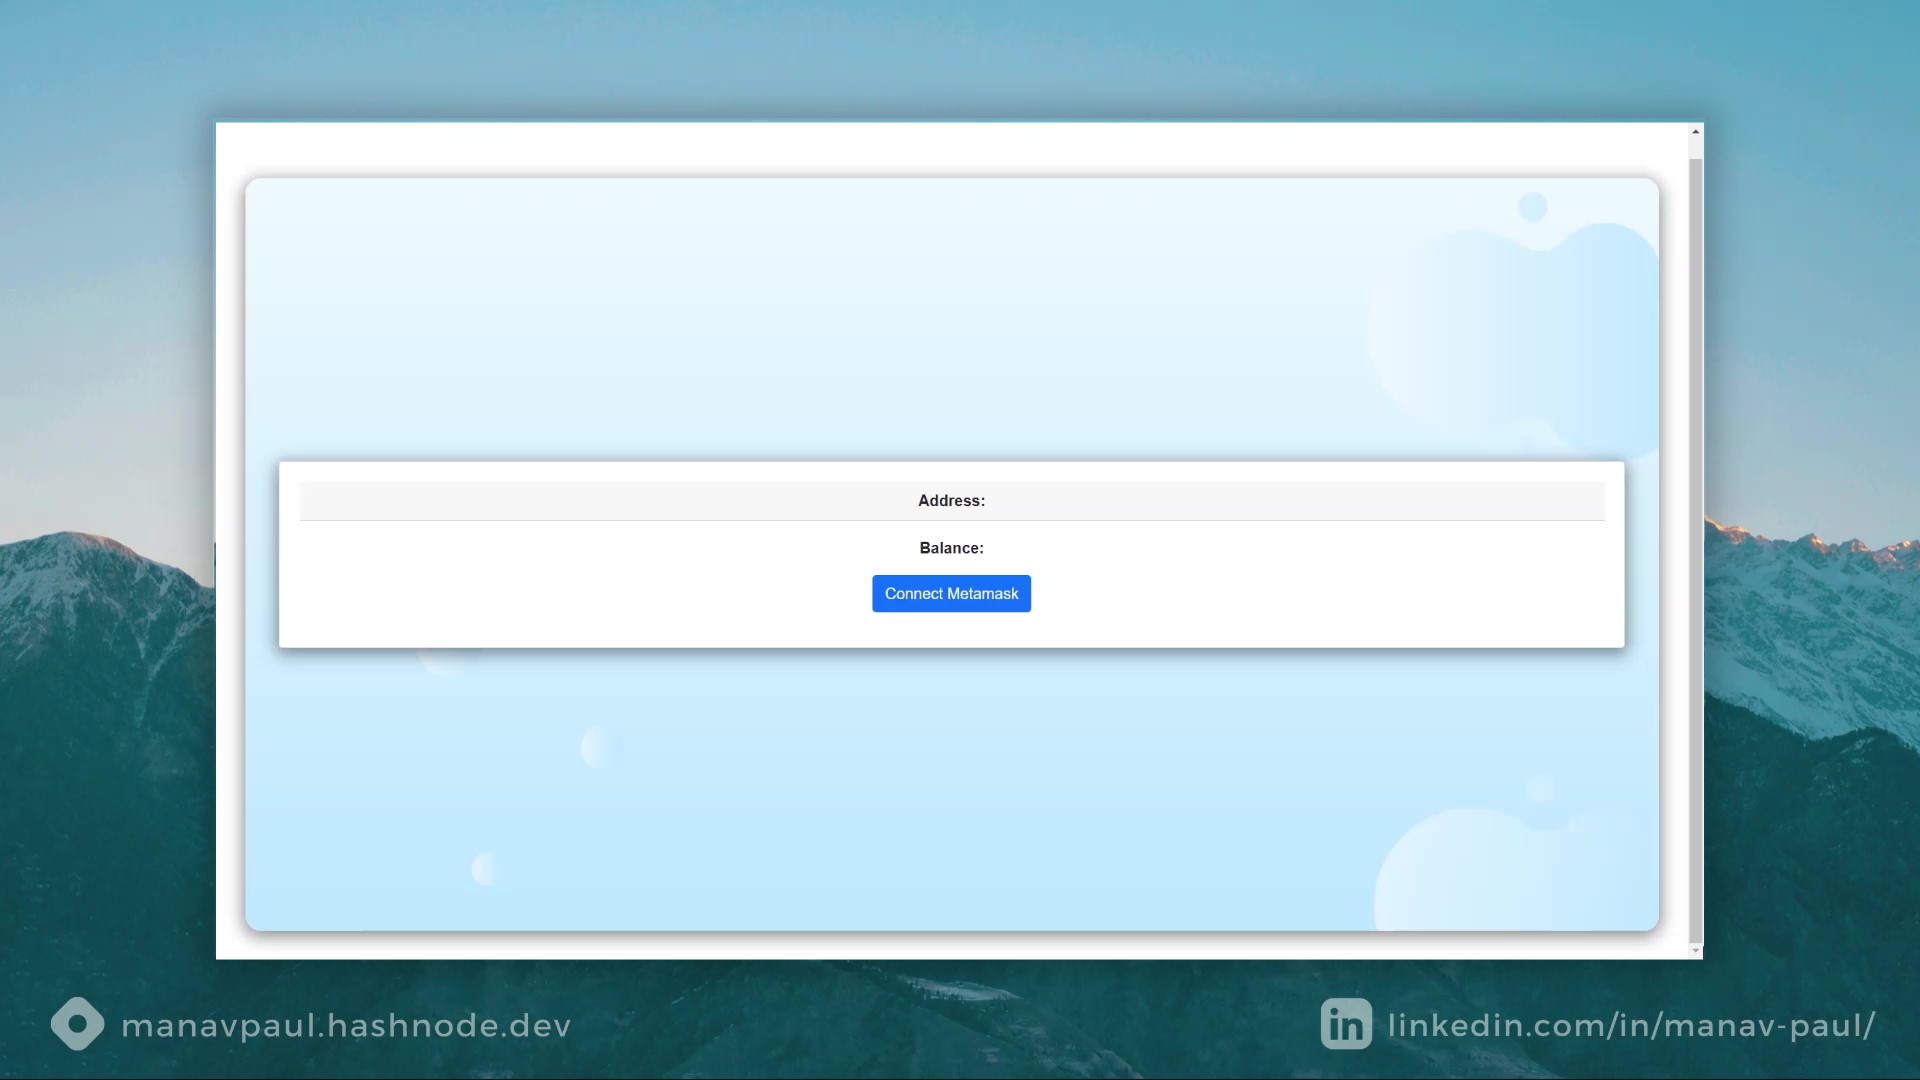
Preview this project Live Website: Wall C
Lets begin with creating React Application
Step 1: Creating a react project with CLI
Use the following command in Terminal section of your code editor.
npx create-react-app eth_app
or
yarn create react-app eth_app
Move into Project Directory
cd eth_app
Installing ether.js
npm install --save ethers
Installing react bootstrap validation
npm install react-bootstrap-validation --save
Install bootstrap
npm i bootstrap
Step 2: Connecting Metamask to react app.
For achieving the meta mask wallet address we need to connect MetaMaks to our react app. For checking, if meta mask is connected.
if(window.ethereum){
      // Do something
    }else{
      alert("install metamask extension!!")
    }
Now, if meta mask is installed we need to request the account.

window.ethereum.request({method:'eth_requestAccounts'})
.then(res=>{
        // Return the address of the wallet
        console.log(res)
})
For getting the balance we need to request the balance method
window.ethereum.request({
    method:'eth_getBalance',
    params: [address, 'latest']
}).then(balance => {
    // Return string value to convert it into int balance
    console.log(balance)

    // Yarn add ethers for using ethers utils or
    // npm install ethers
    console.log(ethers.utils.formatEther(balance))
    // Format the string into main latest balance
})
Step 3: Fetch Data to React
For fetching the information into react page, we will use useState for setting the value from the javascript method and using into jsx
const [data, setdata] = useState({
    address:'',    // Stores address
    Balance: null  // Stores balance
  })
Step 4: Final Program in the eth_app/src/App.js
App.js File
// Importing modules
import React, { useState } from "react";
import { ethers } from "ethers";
import "./App.css";
import { Button, Card } from "react-bootstrap";
import "bootstrap/dist/css/bootstrap.min.css";

function App() {

//Fetch Data to react
// storing and retrieving wallet details
const [data, setdata] = useState({
    address: "",
    Balance: null,
});

// Button handler button for handling a request event for metamask

const btnhandler = () => {

    // Checking if metamask is already present or not
   //  if meta mask is installed we need to request the account.

    if (window.ethereum) {

    // res[0] for fetching a first wallet
    window.ethereum
        .request({ method: "eth_requestAccounts" })
        .then((res) => accountChangeHandler(res[0]));
    } else {
    alert("Install metamask extension!!");
    }
};

// getbalance function for getting a balance

const getbalance = (address) => {

    // Requesting balance method
    window.ethereum
    .request({
        method: "eth_getBalance",
        params: [address, "latest"]
    })
    .then((balance) => {
        // Setting balance
        setdata({
        Balance: ethers.utils.formatEther(balance),
        });
//Format the string into main latest balance
    });
};

// Function for getting handling all events
const accountChangeHandler = (account) => {
    // Setting an address data
    setdata({
    address: account,
    });

    // Setting a balance
    getbalance(account);
};

return (
    <div className="App">
    {/* Calling all values which we
    have stored in usestate */}

    <Card className="text-center">
        <Card.Header>
        <strong>Address: </strong>
        {data.address}
        </Card.Header>
        <Card.Body>
        <Card.Text>
            <strong>Balance: </strong>
            {data.Balance}
        </Card.Text>
        <Button onClick={btnhandler} variant="primary">
            Connect Metamask
        </Button>
        </Card.Body>
    </Card>
    </div>
);
}

export default App;
App.css
.App {
  text-align: center;
  background-image : url("sadb.png");
  box-sizing: border-box;
  box-shadow: 0 4px 17px 2px rgba(0, 0, 0, 0.451);
  margin: 30px;
  padding: 0px;
  background-size: cover;
  border-radius: 1rem;
  margin-top: 5rem;


    display: flex;
    flex-direction: column;

}


.App-logo {
  height: 40vmin;
  pointer-events: none;
}

.text-center {
  box-sizing: border-box;
  margin-top: 10%;
  box-shadow: 0 4px 17px 2px rgba(0, 0, 0, 0.451);
  margin: 35px;
  padding: 20px;
  border-radius: 2rem;
  margin-top: 20%;
  margin-bottom: 20%;
  font-family:sans-serif;
}

@media (prefers-reduced-motion: no-preference) {
  .App-logo {
    animation: App-logo-spin infinite 20s linear;
  }
}


.App-header {

  background-color: #7faaff;
  min-height: 100vh;
  display: flex;
  flex-direction: column;
  align-items: center;
  justify-content: center;
  font-size: calc(10px + 2vmin);
  color: rgb(255, 255, 255);
}

.App-link {
  color: #00c8ff;
}

@keyframes App-logo-spin {
  from {
    transform: rotate(0deg);
  }
  to {
    transform: rotate(360deg);
  }
}
Thanks for taking the time to read this article!
▶Next : Master Solidity: Build decentralized applications.
Documenting my journey with Solidity, Blockchain and Web3.
Drop a comment here, share or hit me up on Twitter! ♥


